|
|
| Line 1: |
Line 1: |
| __TOC__ | | __TOC__ |
|
| |
|
| == Introduction == | | == Description == |
|
| |
|
| The first part is the braille display. The braille display refers to the way we are going to display braille. This could be done with either providing a solid plate in which braille is already displayed and simply using that or a mechanisms which display’s the braille. This mechanism could for example be manually pushing the pins to create a braille display. Depending on the depth of which we want to test, there are multiple options to create the braille display. | | The dummy sentence is the first physical thing that will be designed. As stated earlier, the dummy sentence was chosen to be made to provide a full sentence in braille, without the product being extremely expensive. The initial plan was to make a prototype in which a full sentence could be displayed on demand. However, the final product will be a static sentence. The reasons for this will be explained in this section. |
| <br><br> | | <br><br> |
|
| |
|
| == Modelling ==
| |
|
| |
|
| The first option is to create a very basic braille display dummy. This dummy would be similar to a solid plate, which contains braille, and could be attached on top of the casing of the robot. This form of braille display will be relatively simply and will ignore the user preferences for material types or other preferences such as a button and focus more on main interactions. These interactions will be purely based on what they think of the idea and what they would improve. This option would be sufficient in case you want to verify the intent of your product. In case you want to test multiple things such as user preferences for example materials or buttons, this option might be insufficient. On another note, this option might be sufficient as a base dummy in which you can extent later on. For example it might be possible attach the materials which you wish to test into the basic braille display or to create buttons at the end of the display. However, depending on the design of the display, extensions might have a low quality. | | == First ideas == |
| | |
| | The initial idea for a dummy sentence was to make a prototype with a predefined sentence, which could be displayed on demand. This way, the idea of a refreshable braille display, in which letters appear and disappear, remains. However, because no electronics are used, the cost of the prototype would be low. |
| <br><br> | | <br><br> |
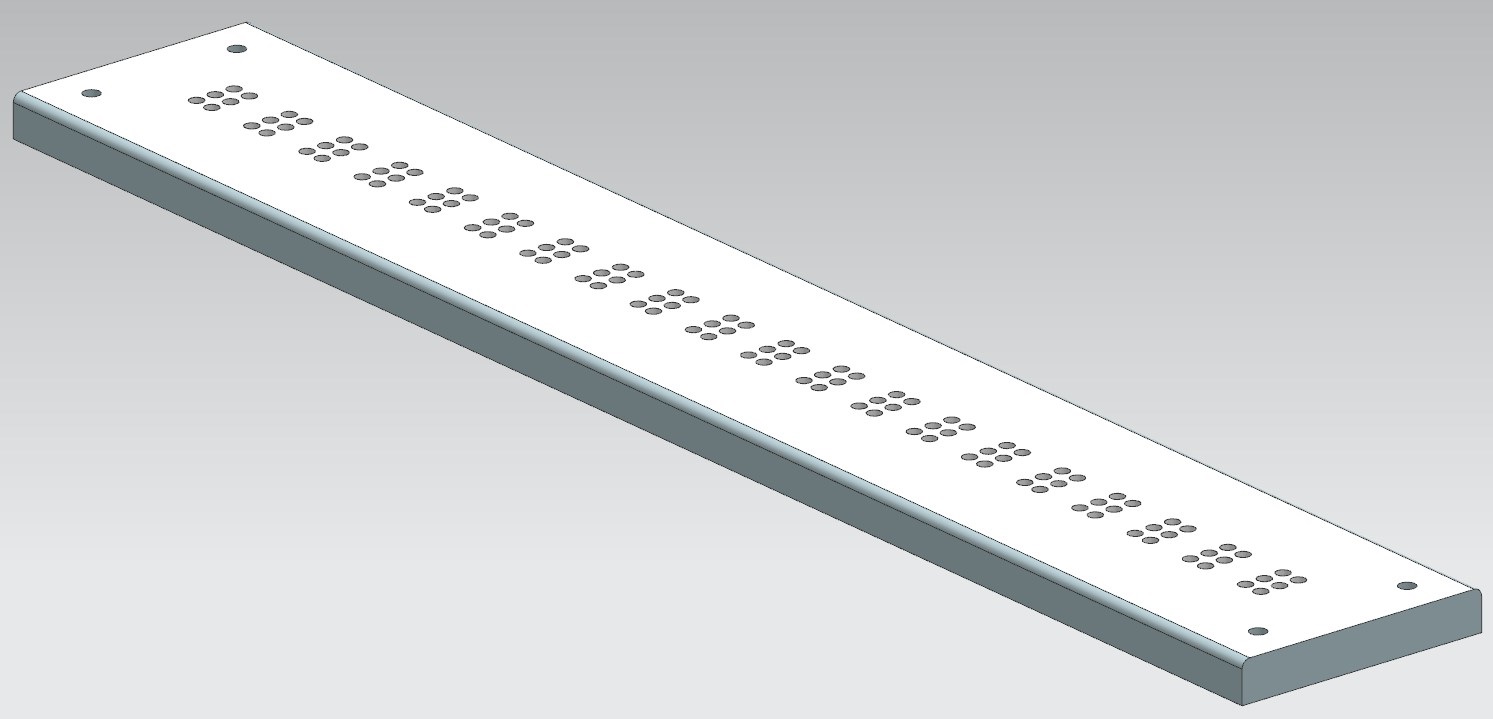
| | With this in mind, the first version of the 3D model was made, which can be seen in the figure below. |
| [[File:Dummy.jpg]] | | [[File:Dummy.jpg]] |
|
| |
| === Subsection ===
| |
|
| |
| The second option for the braille display would be to design a display similar to the previous one, but instead design it with these extensions already included. In other words, a braille display consisting of a to-be-tested material which contains braille which is changeable. This could be done in either two ways. The first one would be to create a display on which the materials can be attached upon in such a way that the readability of the display is sufficient. This method would allow for easier testing since both materials could easily be changed and it allows for reusability of the braille display. The main problem with this method would be the technical problem, in which you have to create a mechanism with a loosely coupled material who ensures sufficient readability. The main problem with the readability would be the that the material would simply be pushed up completely by the braille pins since it’s loosely attached. This problem would could be solved by making the material more attached to the braille display, however this method might then lose its purpose depending on how tight the attachment is.<br>
| |
| The second method to achieve this option would be to create the multiple displays in which the to-be-tested material are integrated. In these displays, the materials would be strongly attached to the display. This method does not suffer from the problems that the previous method does. This method instead uses more materials, as multiple displays have to be created. Additionally, due to the aforementioned reasons, the reusability of the display is lower.
| |
| <br><br> | | <br><br> |
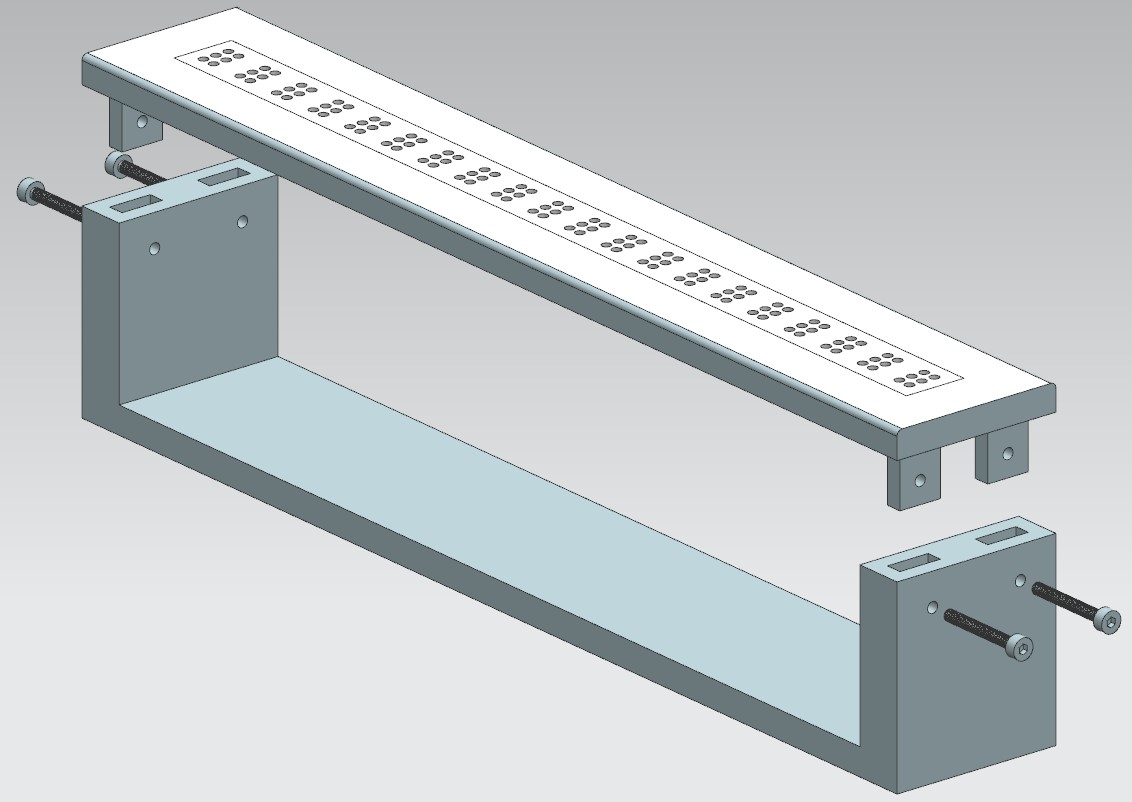
| | | As can be seen, the idea was to be able to screw this plate to a base below it, where the mechanism would be located to move a sentence up and down through the holes in the display. However, since the plan was to 3D print the model, it was realised that this was not realistic, since the 3D printer would have to print very fine screw thread. Therefor, the dummy was remodelled to be more “3D printer friendly”. |
| The dummy is 3D printed to have a physical product. The top part of this is already finished, which is shown in the figure below.
| | [[File:Dummy_V2.jpg]] |
| [[File:Dummy_top.jpeg]] | |
Revision as of 11:54, 4 April 2019
Description
The dummy sentence is the first physical thing that will be designed. As stated earlier, the dummy sentence was chosen to be made to provide a full sentence in braille, without the product being extremely expensive. The initial plan was to make a prototype in which a full sentence could be displayed on demand. However, the final product will be a static sentence. The reasons for this will be explained in this section.
First ideas
The initial idea for a dummy sentence was to make a prototype with a predefined sentence, which could be displayed on demand. This way, the idea of a refreshable braille display, in which letters appear and disappear, remains. However, because no electronics are used, the cost of the prototype would be low.
With this in mind, the first version of the 3D model was made, which can be seen in the figure below.
As can be seen, the idea was to be able to screw this plate to a base below it, where the mechanism would be located to move a sentence up and down through the holes in the display. However, since the plan was to 3D print the model, it was realised that this was not realistic, since the 3D printer would have to print very fine screw thread. Therefor, the dummy was remodelled to be more “3D printer friendly”.