Embedded Motion Control 2015 Group 5: Difference between revisions
| Line 144: | Line 144: | ||
|[[File:RotateEMC05.png|700px|thumb|Rotation skill]] | |[[File:RotateEMC05.png|700px|thumb|Rotation skill]] | ||
|} | |} | ||
===Evaluation=== | ===Evaluation=== | ||
Revision as of 12:37, 26 June 2015
This Wikipedia page is written as a log of the project of the course Embedded Motion Control. The aim of this course is to design and apply software in the context of an autonomous robot. Therefore two assessment moments are held. This Wikipedia page is structured according to these two assessment moments, namely the corridor challenge and the maze challenge.
Group Members
| Name: | Student id: |
| Bart van Willigen | 0770142 |
| Joost Peters | 0747630 |
| Robin Loose | 0771575 |
| Koen Bos | 0763939 |
| Joost Franssen | 0824821 |
| Lotte de Koning | 0655209 |
| Marjon van 't Klooster | 0819200 |
Software Design

After a first successful brainstorm, the first draft of the system interface is determined. In this schematic the different contexts are presented. The goal to solve the maze is monitored by the Task monitor. Based on the observed environment and the maze solving algorithm, a set of skills is selected. Task control feedforward is used when no deterministic choice can be made. These skills are based on the robot's basic functions. An overview of the software design assignment can be found here.
Corridor challenge
In the first assessment moment, the corridor challange, the robot has to drive autonomously through a corridor where it has to take the first exit. This first assessment moment is a great way find out whether or not your code works as it should. Taking the first exit showed to be manageable, however the task was not performed in a fluent manner.
This entire chapter only applies to the Corridor challenge, for the Maze challenge many changes are made which will be discussed in Chapter Maze challenge.
Considerations
During the code development for the Corridor challenge, a few options are considered. Below is a brief overview of some of those options.
LRF data
To know and use the position and orientation of the robot and its surroundings, either the Odometry data or the Laser Range Finder is used as for the main data acquisition. For the Corridor challenge, only the local positioning and the local orientation of PICO are important. Since the Odometry data is highly affected by disturbances (e.g. slip of the wheels) it is not very accurate for local positioning and orientation. Therefore the LRF is more suitable for this challenge than the Odometry data. The data can be divided in different bundles, all kinds of different tasks and skills can make use of the bundles which are most applicable. When global positioning and orientation become more important, the Odometry data can be used for rough estimations. For the Corridor challenge, the LRF data has not been altered, the raw laser data is used to make PICO navigate through the corridor.
Manual setpoints
During the challenge, it was clearly visible which groups used a potential field: PICO drove through the corridor very fluently. However, the main disadvantage of using such a potential field is not being able to manually place setpoints. For this reason, it was decided not to use a potential field, but to place setpoints manually. An example of such a manual setpoint is elaborated on in the code overview in this chapter: Center at junction.
Code overview
Aligning and centering the robot
In order to drive straight and centered in a corridor, a function is created which aligns and centers the robot w.r.t. the corridor walls. The function consists of two parts; a part that uses two beam bundles on each side of the robot and compares their length in order to center the robot (Figure left), and a part that uses three small beam bundles on one side of the robot to align it with the walls. A safety check is implemented to make sure the robot ignores cracks in the corridor walls. A proportional controller is implemented for correcting the robot’s misalignment, this means that the more the robot is off-center or misaligned, the larger the control action will be to correct this.
Implementation in corridor challenge When implementing the function for the corridor challenge, two issues arose: the proportional control could lead to problems when the system stability was compromised. Extreme high gain would result easily into a crash. A second issue was compatibility with the rotate function; during rotation at the corner, the alignment function interfered and this resulted into unwanted effects. A reason for this could be our main algorithm that consisted of a switch-case construction that was far from optimal. During the corridor challenge the align-part was disabled in order to complete the challenge.
Recognize junction
The robot is able to robustly distinguish cracks from junction. If the laser on the left or right of the robot detects a large distance, a bundle of lasers around the perpendicular laserbeam is analyzed. The angle between the first and last bundle with a large distance is calculated and this angle, combined with the corresponding distances at the outer beams of the bundle, is used to calculate the width of the crack (or junction).
width_crack = sin(angle_ crack2)*distance[outer_ bundle];
This width is now used to distinguish small cracks from actual junctions in the corridor.
Take a turn
When a decision is made to turn left or right some skills will be performed. First PICO is positioned in the middle of the junction, with the skill: junction_mid. Then PICO will rotate on his position around his axis with the function rotate and after this PICO will drive forward until it is in the corridor. When two walls are detected next to him the center function will take over and will drive further until the exit is detected. These different skills are described below.


Center at junction
When a junction is detected and the decision has been made to enter a specific corridor, the function ‘junction_mid’ is started. The goal of this function is to stand still at the exact middle (target) of the corridor which is about to be entered. To find this exact middle, the beam to the opposing corner of the entrance is measured (1) as soon as beam (2) passes the corner. Beam (1) can then be used to compute the width of the corridor (corr_width) and therefore, the middle of the corridor is also known. Junction_mid ends when it has reached the half width of the corridor (target).
Rotate
The rotation for the corridor challenge is based on the form of the corner of the wall. As example the right rotation will be used as explanation. First the corner is detected through analyzing the laser bundle at the upper right quarter of PICO, the shortest vector bundle is used as reference for the corner. For a 90 degrees rotation it can be calculated which vector bundle is needed at the left side of PICO. PICO will rotate until the vector bundle at his left side is equal to the reference vector bundle. See the rotation skill figure below.
Detect exit
This function is constantly checking if the exit of the maze is reached. The LRF data is divided into ten bundles and if all of these bundles each show an average distance larger than 1.5 m, the exit of the maze is reached. In this case, the robot stops and the program is ended.
Decision making
When an event has been detected (detect_event) and the worldmodel has been updated (update_nodes), a decision is made by the decision_making function. If the current node has not been encountered before, a random choice is made between all possibilities. However, if the node has been encountered before, PICO is either on its way back to the last node with undiscovered paths or it has made a loop. PICO's current coordinates are compared to all nodes in the node list. If the coordinates match another node within a tolerance, the node type is compared to the current node type. Depending on the orientation of the current- and of the other node, it is decided whether they can be the same node or not.
If the nodes are the same and PICO is returning to the last node, a random decision is made between undiscovered paths. When no undiscovered paths are left, return in the correct direction. If the nodes are the same and PICO is not returning to the last node, the function will check for undiscovered paths in the loop form the node list. If there are still undiscovered paths in the loop, the loop will be entered again. Otherwise, the path is followed back until an undiscovered path is encountered.
Since the decision making function is part of the main loop, the function runs at the same frequency as main does. Therefore, a decision is only made right after an event has been detected. On other time instances, the function returns 0.
The function is described in pseudocode below.
int decision_making { if ( coordinates match == true ) { if ( node types and orientation match == true ) { if ( returning to last node == true ) { choose a random undiscovered path or return even further } else { if ( possibilities within the loop == true ) { enter the loop again } else { return on the path that did have possibilities } } } }
else { make a random decision out of the possibilities } }


Evaluation
PICO executed the Corridor Challenge as expected, however this was most certainly not the most efficient way:
- Centering PICO between two walls was not robust with gaps in the walls;
- Cornering was not efficient: PICO did not follow the apex of the corner;
- PICO was not programmed to drive at maximum (driving/angular) velocity;
- about 90% of the data was thrown away;
- The code's structure was insufficient.
If PICO had to do the Corridor Challenge again, certain changes would be made to the code:
- The entire code structure has to be revised;
- To make navigating the maze more robust, all data has to be used in stead of 10%;
- However this raw data has to be modified in order to make it applicable;
- The output of the modified raw data is very different from the LRF output, therefore most of the skills/tasks have to be rewritten;
- To be able to compete with other groups, PICO needs to follow the apex.
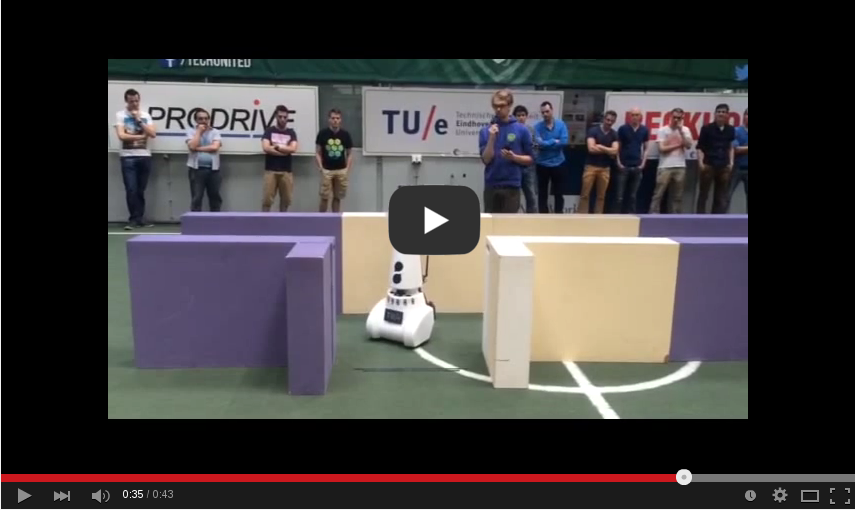
See the video of the corridor challenge!
Maze challenge
Considerations
During the code development for the Maze challenge, a few options are considered. Below is a brief overview of some of those options. Some of the options/considerations have not been changed since the Corridor challenge, but there are some differences.
LRF and odometry data
The Laser Range Finder data is still suitable for the local coordinates and orientation of PICO. However, to solve amaze, PICO has to be able to know where he is w.r.t. not only it's environment, but also the entire maze. Therefore the odometry is used for estimations of the global coordinates and orientation. Another difference with the Corridor challenge is the fact that PICO does not use the raw laser data anymore, but first applies a filtered Hough Transform on that data.
Manual setpoints
Just like with the Corridor challenge, setpoints are placed manually to keep control over PICO's pathing. The explicit functions however have changed quite a bit.
Code overview
Code structure
main(){
    while ( io.ok ){
          communicate();  	     	//Receive data
          detect_event();  	     	//Recognize events
          worldmodel();	     		//Update the worldmodel
          decision_making();	     	//Decides which task needs to be executed
          exec_decision();	     	//Execute decision
          orientation_tracking();       //Orientation of PICO relative to the start
          worldmodel();	     		//Memorize taken decision
     }
}
Hough Transform
In order to interpret the data obtained from the LRF, the laser data is processed using a Hough transformation. This transforms the data points into lines, therefore the robot can interpret these lines as walls of the maze.
The Hough transform algorithm from the OpenCV library plots for a given point [math]\displaystyle{ (x_0,y_0) }[/math] the family of possible lines that goes through that point. Each line which goes through point [math]\displaystyle{ (x_0,y_0) }[/math] can be described as: [math]\displaystyle{ r_{\theta} = x_0 cos(\theta) + y_0 sin(\theta) }[/math]. This results in a plot with a sinusoid for each point, for three points, this will result in the figure below. Here, the sinusoids for three points are plotted. The three plots intersect in one single point, which means that one line is represented by three data points. When using the Hough transform function a threshold is defined, which indicates the minimum number of intersections needed to detect a line.

We used the Probabilistic Hough transform function, which returns the extremes of the detected lines [math]\displaystyle{ (x_0,y_0,x_1,y_1) }[/math].
Unfortunately, the output of this algorithm describes one wall in the maze with multiple lines. This is a redundant and (for some other functions) unwanted phenomenon. With only altering the resolution of [math]\displaystyle{ r }[/math], the problem was not solved and the duplicate lines were still present. In order to make sure that all visible walls are always represented by a single line, a filtering algorithm is used.
Hough Lines Filter As mentioned, the output of OpenCV often consists of multiple redundant lines. To easily distinguish which lines are similar (and possibly represent the same wall), the cartesian coordinates of the lines are transformed to polar coordinates. If the radius to a line and the angle to a line are similar, it is assumed that the lines represent the same wall. All similar lines but the longest are thrown away. So the output has the same number of lines as the amount of visible walls.


Detect Junction

The filtered Hough lines are used to detect the different types of junctions, e.g. T-junction, dead end or right turn. vertices of the lines are used to distinguish the different junctions:
- Corridor, No vertices.
- Dead end, Two connected vertices and PICO is in-between the x-locations of the points.
- Left turn, One vertex to the right of PICO, PICO is in between the x-locations of the horizontal line.
- Right turn, One vertex to the left of PICO, PICO is in between the x-locations of the horizontal line.
- T-junction left, One vertex to the left of PICO, both connected lines are to the left of PICO.
- T-junction right, One vertex to the right of PICO, both connected lines are to the right of PICO.
- T-junction, No vertices and PICO is able to detect a horizontal line in front.
- Crossing, Two vertices, one to the right and one to the left of PICO that are not connected.
Rotation
The function rotation consists of three parts, namely: right rotation, left rotation and dead-end. Through the decision making algorithm a right-rotation, left-rotation or a dead-end is indicated. All the kind of junctions can be declare to one of these parts, because the robot has to eventually take a right turn, left turn or a 180 degrees turn. The turns are made by indicating the environment of the junction, for a right turn first a vertical line on the right side of the robot needs to be detected, in combination with a horizontal line in front of PICO. By defining the width of the corridor and the width of the junction an ideal set point is determined whereby PICO can make a 90 degrees turn. This ideal set point trajectory takes care for PICO to end in the middle of the junction parallel to the junction.The rotation function for a right-turn and a left-turn is identical, except for the initial conditions on which the set point trajectory is determined. Then there is the dead-end, in a dead-end PICO has to make sure that there is not a door in the dead end. When an dead-end is detected, PICO drives into the dead end, up till 1m to the end. After that PICO starts to ask to open the door. When the situation in the dead end does not change over 7 seconds, PICO makes an 180 degree turn where after it drives out of the dead-end. If in the 7 seconds a door opens in the dead-end, PICO waits till the door is completely open and then will drive through the door.


Maze challenge
Evaluation
In the eventual maze challenge PICO was not able to detect autonomous the exit of the maze, this is in contradiction to the earlier made simulations, where PICO was able to solve the maze. The difference between the simulations and the real maze are compared, from which conclusions can be drawn. In the simulations, the maze dimensions where very large in comparison to the eventual maze. A corridor in the simulation maze was approximate 2m long whereby the distance between consecutive junctions is sufficient. The real maze was much smaller scaled, causing the junctions to be placed closer together. Because of this PICO did not always have enough time and distance to recognize the upcoming junction. Causing it to drive straight forward and ended up in the function collision prevention.
Course evaluation
Learning points
During the course of Embedded motion control our group learned a lot. At the beginning of the course we were asked to hand in a design document which described the requirements, specifications but also the functions, components and interfaces of our design. This forced the group to really think about what we wanted to achieve before starting head-on with programming. This structured approach really provided insight into tackling a design problem.
The groups were asked to give short presentations about progress and software design. This, together with the wiki-page, learned us that sharing information benefits the design process a lot. Receiving feedback from other groups and of course the lecturers was insightful. The feedback that all other groups received was useful as well. Having to present your work ( and especially your software design) during the design progress really helps you to have a structured approach to the design problem.
The heavy focus on software design during the lectures, provided insight into the importance of structuring your code and design. We learned that actually applying this knowledge as early as possible in the design process benefits the outcome a lot. Our first code design, used for the corridor challenge, was not that structured at all. As we improved the structure of the code, the team members got more and better ideas for solutions in the code.
Another important lesson for us was making decisions. During the project we switched our detection method from using bundles of laser data to using the Hough transformation. This decision had a major impact on our progress, since a lot of the coding had to be reworked. The implementation of the Hough transformation was quite a task and caused a lot of delay in the project. We learned that making decisions and evaluating them properly and timely is of major importance for the progress of your project.
Finally, we ofcourse learned alot of new skills and techniques. Programming in C++ was a new experience for some of us. The emc environment provided on Ubuntu gave us the tools to develop our program skills, and gave us hand on experience of embedding the code on an actual robot which was really awesome to experience. This also showed us that simulation provides a mere indication of your software performance. Testing your software embedded on the hardware is 'the real deal', and proved to be challenging. The oppertunity to experience this during the 'test-hours' was insightful and learned us alot.
Collaboration
During the first lecture of Embedded Motion Control, the participating students were asked to form groups. A nicely mixed group was formed: starting master graduates as well as students closer to graduation. Some finished a pre-master while others had followed the normal Mechanical Engineering Bachelor. However, the majority of the group was not very familiar with coding, let alone C++. Luckily everybody was eager to learn and major improvements were clearly noticeable.
The Bachelor Mechanical Engineering is focused, for a large part, on group assignments, Design Based Learning (DBL). Our group decided to use some techniques learned from DBL to keep the meetings structured, by appointing a dedicated board writer and minutes secretary every meeting. To keep the pace in the project Self Study Assignments were appointed, which were mainly performed in groups to stimulate creativity. All these SSA’s were specifically directed towards the next deadline, like the Corridor and Maze challenge, but also the intermediate presentations.
The group turned out to work very well together: no problems were encountered during the project. An interesting dynamic in this group was the fact that every member took a certain role during the project. For example, one of the group members was the structure specialist, maintaining the integrity of the entire code; there were some specialists for certain specific functions, but there also were all-rounders, helping others with debugging, function strategy or writing smaller parts of functions.
Code
Scheduler
A code snippet of the main function that is used as a scheduler can be found here.
Hough lines filter
As mentioned, a filter is used to exclude redundant duplicate lines from the OpenCV hough transform library. The code snippet of the filter can be found here.
Setpoints rotation
A code snippet of the piece of code that is used to create the parametric setpoints used for the rotation of the robot can be found here.[1].